Microsoft Defender for Office 365 is a robust security solution designed to protect your organization from sophisticated threats like phishing, business email compromise, and malware attacks. Whether you’re securing email, SharePoint, Teams, or OneDrive, Defender for Office 365 ensures your users are safe across Microsoft 365 apps. This blog covers its key benefits and step-by-step setup instructions.
Key Features of Microsoft Defender for Office 365
- Phishing Protection: Advanced phishing detection using machine learning and user impersonation insights.
- Safe Attachments: Automated scanning of email attachments for malicious content.
- Safe Links: Protection from malicious URLs in emails or documents by rewriting them to check for safety upon access.
- Real-Time Reports: Provides rich insights into threats targeting your organization.
- Attack Simulation: Enables you to test user behavior with simulated phishing or malware campaigns.
Benefits of Microsoft Defender for Office 365
- Proactive Threat Protection: Identify and block threats before they impact your users.
- Enhanced Visibility: Monitor attack patterns with real-time dashboards and analytics.
- User Awareness: Simulated attacks and training help improve user awareness and resilience against phishing.
- Integration: Seamlessly integrates with Microsoft 365 apps like SharePoint, Teams, and OneDrive.
- Automation: Automate threat detection and response workflows with Microsoft Sentinel or other SIEM tools.

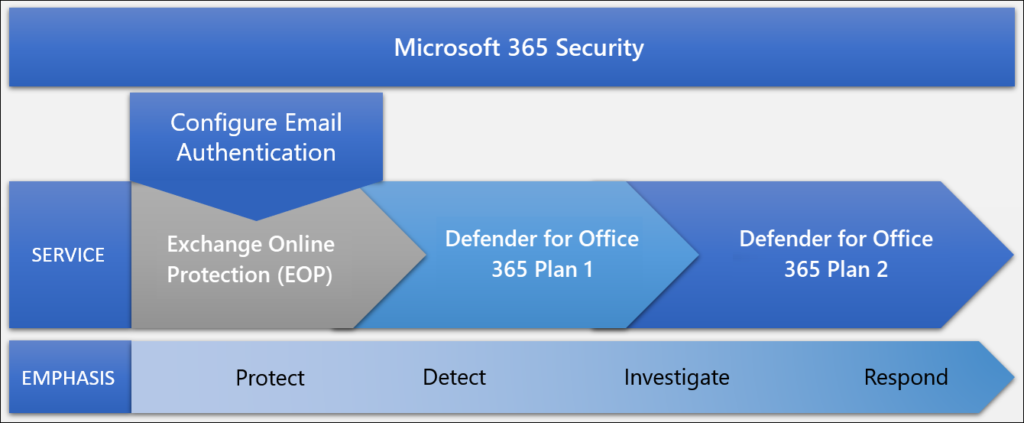
- Exchange Online Protection (EOP): Included in any subscription that includes Exchange Online mailboxes. Also available as a standalone subscription to protect on-premises email environments.
- Defender for Office 365 365 Plan 1: Included in some Microsoft 365 subscriptions with Exchange Online mailboxes that cater to small to medium-sized businesses (for example, Microsoft 365 Business Premium).
- Defender for Office 365 365 Plan 2: Included in some Microsoft 365 subscriptions with Exchange Online mailboxes that cater to enterprise organizations (for example, Microsoft 365 E5, Microsoft 365 A5, and Microsoft 365 GCC G5).
First, you must have completed your deployment of Exchange Online Protection.
Configuration Methods
- Manage using Microsoft recommended preset policies.
- Manage using configuration analyzer.
- Manage through custom policies.
Microsoft recommends starting with their preset policy configurations.
Benefits of using preset policies include:
Time and resource efficiency, Best-practice configurations, Simplified management & Improved security posture.
Get started
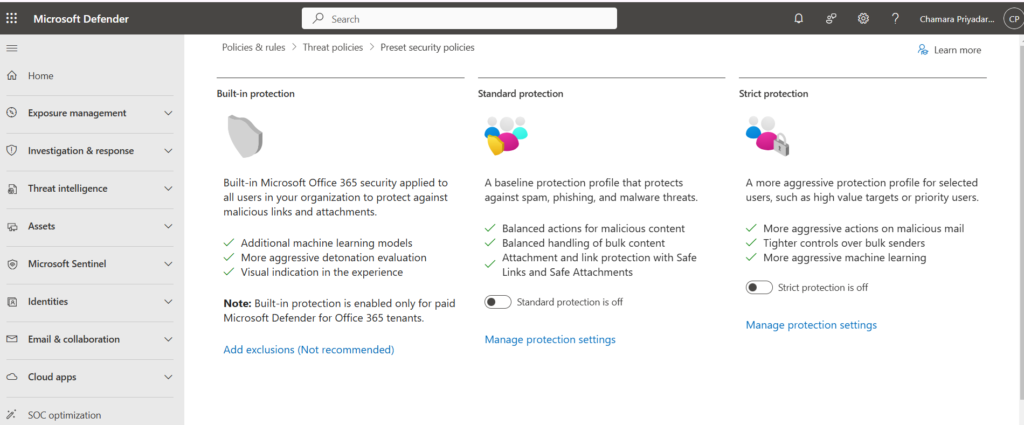
- In the Microsoft Defender portal, go directly to the Preset security policies page.
- Choose “Manage protection settings” under “Standard protection” or “Strict protection”
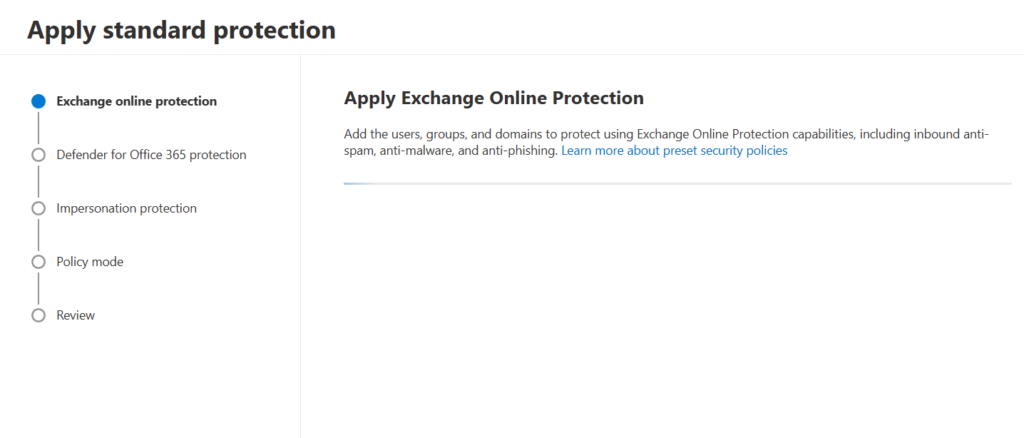
- On the Apply Exchange Online Protection page, identify the internal recipients that the EOP protections apply to:
- On the Apply Defender for Office 365 protection page, identify the internal recipients that the Defender for Office 365 protections apply to.
- On the Impersonation protection page, select Next.
- On the Add email addresses to flag when impersonated by attackers page, add internal and external senders who are protected by user impersonation protection.
- On the Add domains to flag when impersonated by attackers page, add internal and external domains that are protected by domain impersonation protection.
- On the Add trusted email addresses and domains to not flag as impersonation page, enter the sender email addresses and domains that you to exclude from impersonation protection.
- On the Review and confirm your changes page, review your settings. You can select Back or the specific page in the wizard to modify the settings.When you’re finished on the Review and confirm your changes page, select Confirm.
- On the Standard protection updated or Strict protection updated page, select Done.


